Pages in collaborate.green can include multi-row and multi-column tables. You can highlight cells, rows and columns in different colours. When viewing the page, people can sort the table by clicking the column headers.
Inserting a table
To create a table:
- While editing the page, place your cursor at the point where you want to insert the table.
- Choose Table on the toolbar.
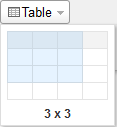
- A dropdown menu will appear, showing a table with a variable number of rows and columns. Click in a cell to set the number of columns and rows for your table.
- Add content and more rows and columns as needed. See below for guidelines on what you can do with your table in the editor.
Screenshot: Inserting a table with 3 rows and 3 columns
What you can do with your table in the editor
While editing a page, place your cursor inside a table to see the table toolbar.
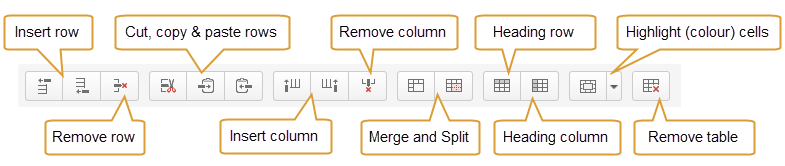
Using the table toolbar you can:
- Insert an empty row above the current one.
- Insert an empty row below the current one.
- Remove the current row.
- Cut the current row and copy it to the clipboard.
- Copy the current row to the clipboard.
- Paste the row from the clipboard to the current row.
- Insert an empty column to the left of the current one.
- Insert an empty column to the right of the current one.
- Remove the current column.
- Merge the selected cells.
- Split the selected merged cells.
- Mark a row as a table header. The cells in the row will be highlighted in grey and the text will be bold.
- Mark a column as a table header. The cells in the column will be highlighted in grey and the text will be bold.
- Highlight cells with a background colour.
- Remove the table.
- Sorting the table in view mode
Sort a table in view mode
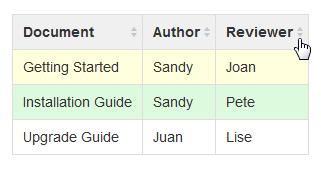
When users view a table on a page, they can sort the table by clicking the sort icons in the header row.
Screenshot: A colourful, sortable table